At first blush, you might be wondering why anyone would need to scan a Linux server for malware.
Selected by Galigio via Computer Borders

At first blush, you might be wondering why anyone would need to scan a Linux server for malware.
Selected by Galigio via Computer Borders
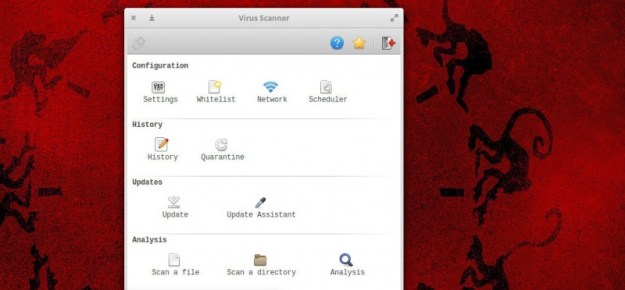
Wait, Linux needs antivirus and anti-malware solutions? I thought it was immune to such things. Perhaps a bit of clarification is necessary here. First and foremost, no operating system is 100 percent immune to attack. Whether a machine is online or offline, it can fall victim to malicious code.
Although Linux is less prone to such attacks than, say, Windows, there is no absolute when it comes to security. I have witnessed, first hand, Linux servers hit by rootkits that were so nasty, the only solution was to reinstall and hope the data backup was current. I’ve been a victim of a (very brief) hacker getting onto my desktop, because I accidentally left desktop sharing running (that was certainly an eye opener). The lesson? Even Linux can be vulnerable.
from https://is.gd/VLyo98
Selected by Galigio via Computer Borders
If you’re new to Linux, you might not know exactly which Linux distribution to use. This is understandable, as there are many, many different types of Linux distributions out there. They all serve different purposes and are geared towards different types of people.
It is because of this, we’ve decided to break down popular Linux operating systems, talk about what they’re for, and how to settle on a distribution. Keep in mind, this isn’t just for people completely brand new to Linux.
from https://is.gd/tJdgUX
Selected by Galigio via Computer Borders
We’ve looked at ways to make GNOME Shell look like Unity before, but a new theme from the b00merang project provides what is perhaps the closest clone yet. It’s a Unity 7 GNOME Shell theme that faithfully recreates the look of the Ubuntu desktop shell in GNOME, BFB-included!
from https://is.gd/7G4NHk
Selected by Galigio via Computer Borders
Sometimes, you may want to combine two files in a way that the output makes even more sense.
If you are on Linux, and are looking for a tool that can help you in situations line these, you may want to check out join, which is a command line utility. In this tutorial, we will discuss this command using some easy to understand examples.
from https://is.gd/cdkdNJ
Selected by Galigio via Computer Borders
The upgrade from Fedora 22 to Fedora 23 is not automatic, as usual in my Fedora experience, but it is really simple to manage if you follow the path suggested by Unixmen.
There are few things you need:
– connect your laptop to the power plug (if you use a laptop);
– a couple of hours (something more or less depending on your CPU, RAM, Internet connection speed, etc..);
– few lines of commands on the Terminal

Image from https://fedoramagazine.org
The upgrading process is well structured and to start it you need to launch Terminal and upgrade the native Fedora Fedup with its new version that now is integrated into DNF:
dnf upgrade
Then you have to install the DNF plugin:
dnf install dnf-plugin-system-upgrade
and finally you can start the “core” part of the upgrade just typing:
dnf system-upgrade download –releasever=23 –allowerasing –best
Where:
– allowerasing will continue the upgrade also in presence of any “old” (not yet upgraded) third part repositories that normally would have completely stopped the main upgrading process
-best is a verbose mode in case of unsatisfied dependencies
After a while, depending on your Internet connection speed, you will be able to conclude the upgrade typing:
dnf system-upgrade reboot
Your laptop will reboot and the upgrade starts.
From now you spend more than 40 minutes waiting and answering to few easy questions that the OS asks you to solve some configuration matters.
The length of the waiting time depends obviously on the CPU, the RAM and the type of Hard Disk installed into your PC.
That’s it!
