The comm command in Linux lets users compare two sorted files line by line. In this tutorial, we will discuss this command line tool using easy to understand examples.
from https://is.gd/BH3gx7
Selected by Galigio via Computer Borders

The comm command in Linux lets users compare two sorted files line by line. In this tutorial, we will discuss this command line tool using easy to understand examples.
from https://is.gd/BH3gx7
Selected by Galigio via Computer Borders
Courtesy of nixpal.com
When you want to check if you have a 32-bit or a 64-bit Linux you can open a Terminal and just type:
file /sbin/initor
archIf you prefer to know how much about the RAM you installed on the PC, type:
free -m
or
grep MemTotal /proc/meminfo
for more detailed info you can try:
cat /proc/meminfoor
grep MemTotal /proc/meminfo
if you prefer to monitor your RAM in real time.
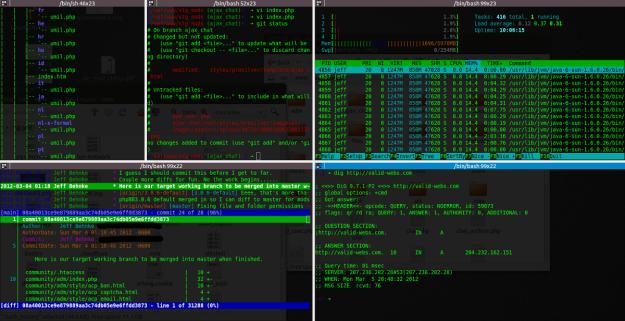
Courtesy of validwebs.com

Sooner or later, if you use Linux and you prefer Terminal to GUI you will stumble on this message:
Username is not in the sudoers file. This incident will be reported
The first thing to clarify is that the “incident” will never be reported outside your computer but in the auth.log file. But if you have previously configured your Linux OS to send these kind of logs to you by email, you receive an alert about.. your own activity with sudo…
In any case, to solve the above mentioned specific sudo matter, use Terminal and type:
sudo gedit /etc/sudoers
At this point the text file “sudoers” will be opened and you will be able to modify it using e.g. gedit.
Obviously you can use another text editor you prefer as, for example, nano. In this case the command will be:
sudo nano /etc/sudoers
Now you have to peer into the text and find the “#User privilege Specification” section and add the command:
your-username ALL=(ALL:ALL) ALL
where ALL=(ALL:ALL) ALL stands for: allow the specific user (your-username) to access all the terminals, as if he/she were any other user, and allow him/her to execute the full range of commands.
And you will obtain something similar to this:
# User privilege specification
root ALL=(ALL:ALL) ALL
your-username ALL=(ALL:ALL) ALL
Try it! (..if you need…)
——————-
References:
https://help.ubuntu.com/community/RootSudo
 Long sophisticated instructions are usually not solely tough to recollect but in addition take a lot of time to be typed. When it’s a must to use them on day by day foundation, you turn into annoyed when typing them repeatedly and again… So, ‘alias’ are extra appropriate for lengthy and complex commands.
Let’s think about an example.
To find the top 10 largest files in your system, you can set the next ‘alias’:
alias top10files=”find . -type f -exec ls -sh {} \; | sort -n -r | head -10”
You can even combine different instructions with ‘alias’. As an illustration, if you happen to often use ‘tail’ and direct its output to file to later view that file, you may set a very simple ‘alias’ to do this cumbersome operation in 1 word:
alias Tail=”tail /var/log/messages > hello.txt;cat hello.txt”
Now just enter ‘Tail’ and voila! All is done at once.
You need to use any file with tail and direct its output and you’ll even use ‘nano’ or ‘vi’ to view/edit its output.
Here’s one other example… ‘alias’ to connect to a remote server:
alias any_name=”ssh -l -p ”
You possibly can even create ‘alias’ on your bash scripts, like:
alias clc=”sh /home/user/myscripts/calc.sh”
Now that you have set a number of totally different ‘alias’ you may want to test that which ‘alias’ are set in your system. To do that, simply difficulty the next command:
alias
and it will list all the set ‘alias’ you have.
To remove an ‘alias’, just issue the ‘unalias’ command, like:
unalias Google
and now typing Google in Terminal will do nothing (as it was set with lynx).
To remove all the ‘alias’, issue the following command and all the ‘alias’ are gone:
unalias -a
We have mentioned the way in which of setting the ‘alias’ for different sorts of commands. However setting ‘alias’ in this approach be temporary. While you reboot you PC, all the ‘alias’ which you will have set will probably be gone. This does not mean that it’s a must to set all of the ‘alias’ each time you boot your PC. You probably have set an ‘alias’ and you favored it a lot that you really want it to completely reside in you PC, simply add this alias in ‘.bashrc’ file in you dwelling directory. For example, if you would like ‘alias’:
Set up <software_name>
to permanently reside in your PC then user your favorite text editor and add the following line in your ‘~/.bashrc’ file:
alias Install=”sudo apt-get install”
Now this ‘alias’ will not vanish into thin air when you reboot your PC. Only those ‘alias’ which are listed in ‘~/.bashrc’ file will be permanent.
This information is just a preview about ‘alias’. It’s just about primary ways of using ‘alias’ to make your life simpler. ‘GNU alias’ is a instrument which can simplify your life immensely. But sadly this device isn’t given the attention it deserves. Briefly, it is such a strong tool that when you give it proper time, it could possibly make you overlook typing. 

![]() Computer networks are sometimes comprised of various methods, and while operating a network made up fully of Ubuntu desktop and server computer systems would definitely be enjoyable, some community environments must consist of both Ubuntu and Microsoft Windows systems working collectively in harmony.
Computer networks are sometimes comprised of various methods, and while operating a network made up fully of Ubuntu desktop and server computer systems would definitely be enjoyable, some community environments must consist of both Ubuntu and Microsoft Windows systems working collectively in harmony.
When making an Ubuntu shared folder that was created with NTFS be accessible to Windows XP steps. Run the NTFS configuration tool on the drive.
It is advisable have admin rights to do that modification.
Select: Application –> Accessories –>Terminal
then type the following:
sudo gedit /etc/samba/smb.conf
In the [global] section, add the following line:
usershare proprietor only = false
![]() Installing software on Ubuntu is really easy but sometimes we can have problems to uninstall it if we have not used the Package Manager (Synaptic till Ubuntu 9.04 and later through the Software Center) or a .deb package. To fastly uninstall all the software you do not need or you are not fond of, you can type in the Terminal:
Installing software on Ubuntu is really easy but sometimes we can have problems to uninstall it if we have not used the Package Manager (Synaptic till Ubuntu 9.04 and later through the Software Center) or a .deb package. To fastly uninstall all the software you do not need or you are not fond of, you can type in the Terminal:
sudo dpkg -r your_file
An alternative and powerful way is typing:
sudo apt-get remove your_file
(where your_file it is the name of the software you want to remove)
or, if you want to completely cancel also the configuration files:
sudo apt-get --purge remove your_file
If you want to check what software is installed on you Ubuntu you can use:
dpkg --list
and you will obtain a complete list of software and a very short summary for each package.
 Hace unos días he encontrado esta nueva aplicación para Linux, se llama CLI Companion. Aunque Linux ha evolucionado muchísimo y hay que reconocer que ya casi no hace falta hacer uso de la Consola para ejecutar programas y tareas varias, pero también hay veces que gracias al uso de la Consola se puede solucionar pequeños problema que de otra forma seria bastante mas complicado. En esos casos CliCompanion nos hecha una mano añadiendo una lista con diferentes comandos junto a nuestro terminal. La lista de los comando no es infinita, viene con unos cuantos; para cada comando hay una referencia donde se explica la función, también es posible añadir comandos y los parámetros correspondientes. Además CliCompanion tiene un apartado de búsqueda donde es posible encontrar el comando que mas nos interese en cada momento. Desde cuando lo instalé en mi Kubuntu 10.04, tengo que confirmar que es una muy buena aplicación y puede ser instalada con lo repositorios correspondientes y tener futuras actualizaciones o directamente através el paquete .DEB. Os dejo el enlace de la Web: http://okiebuntu.homelinux.com/okwiki/clicompanion

